How to Make a Sketchbook
- sadiemcarfagno
- Oct 16, 2025
- 2 min read
Updated: Oct 21, 2025
How book bind and create your own sketchbook

Materials:
12" x 7" Cardboard
2" x 7" Graph Paper
10" x 7" pieces of paper (12 of these)
3 Strands of Thread
Bone Folder
Needle
Awl
Binder Clip
Glue (preferably Yes glue)
Scissors
Ruler
Step 1:
Fold your 10" x 7" paper in half, making the creases crisp by running over them with the bone folder
Sort the paper into 3 groups, each one layered together with each creased part of the paper tucked inside one another. These are called "signatures"
Step 2:
Fold the 2" x 7" graph paper in half longways and short way
Then bring the edges to the middle creases and fold new creases, both longways and short way (see video)
Place 3 dots where the creases intersect
Step 3:
Your 3 signatures should be stacked and folded over like books. Open them up to the middle, tuck the graph paper inside, lining the edges up with the signatures
Poke holes in the creases of the signatures with the awl, going through the marked dots on the graph paper (only the three vertical dots within the crease of the folded graph paper within the folded paper)
(poke away from your body!)
Step 4:
Grab the 12" x 7" cardboard, place it longways in front of you
At the bottom edge of the cardboard use your ruler to mark 7 inches from either side to the middle.
Repeat again for the top edge
Connect the top and bottom dots with a vertical line on the left side with a pen. Do the same on the right side
Use your ruler and bone folder to gently and gradually fold the cardboard over and press creases where these lines are. This will be the spine of your book
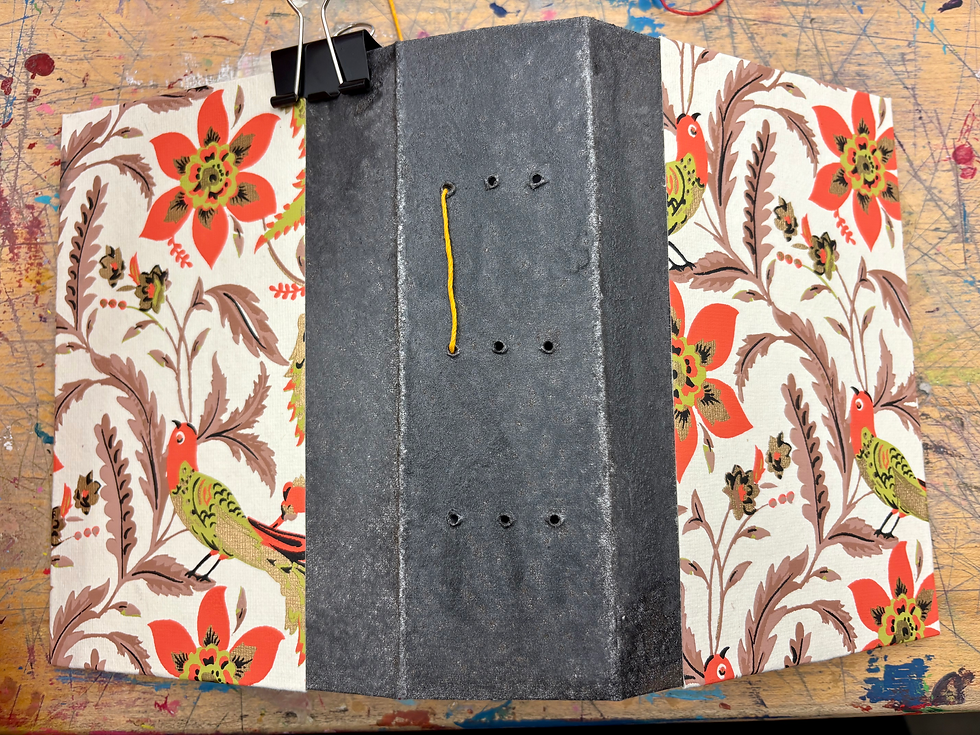
Step 5:
Binder clip the 2" x 7" graph paper into the inside of the spine on the 12" x 7" cardboard
Poke through the 9 marked holes of the graph paper through the cardboard
Step 6:
Decorate the outside and inside of the cardboard (this will be the cover)
Step 7:
Get your string, make sure it's as long as the height of the signatures times 3
Thread your needle. Line the holes of a signature up with the holes on the inside of the spine. Binder clip that signature in place, the signature being open showing the inner most crease. Place one end of the string between in the binder clip as well, over top the interior of the signature

Thread the needle through the middle hole coming from the inside of the opened book and out the back.
Now thread the needle up into the next hole going back through.
Thread the needle through the middle hole again going out the back.
Thread the needle (now on the outside of the book) through the bottom hole so it comes out in the interior of the book again.

Cut the needle from the string and tie the string in the book taught with a square knot located at the middle hole. This is called a "long link stitch"

Repeat with the next 2 signatures


Comments